
Edit
The editor at a glance
A project has four parts: the viewer, the inspector, the timeline and the chat. Here's what each one does and how to arrange them.
Every film opens in the editor. It's the same in the browser and the Mac app.
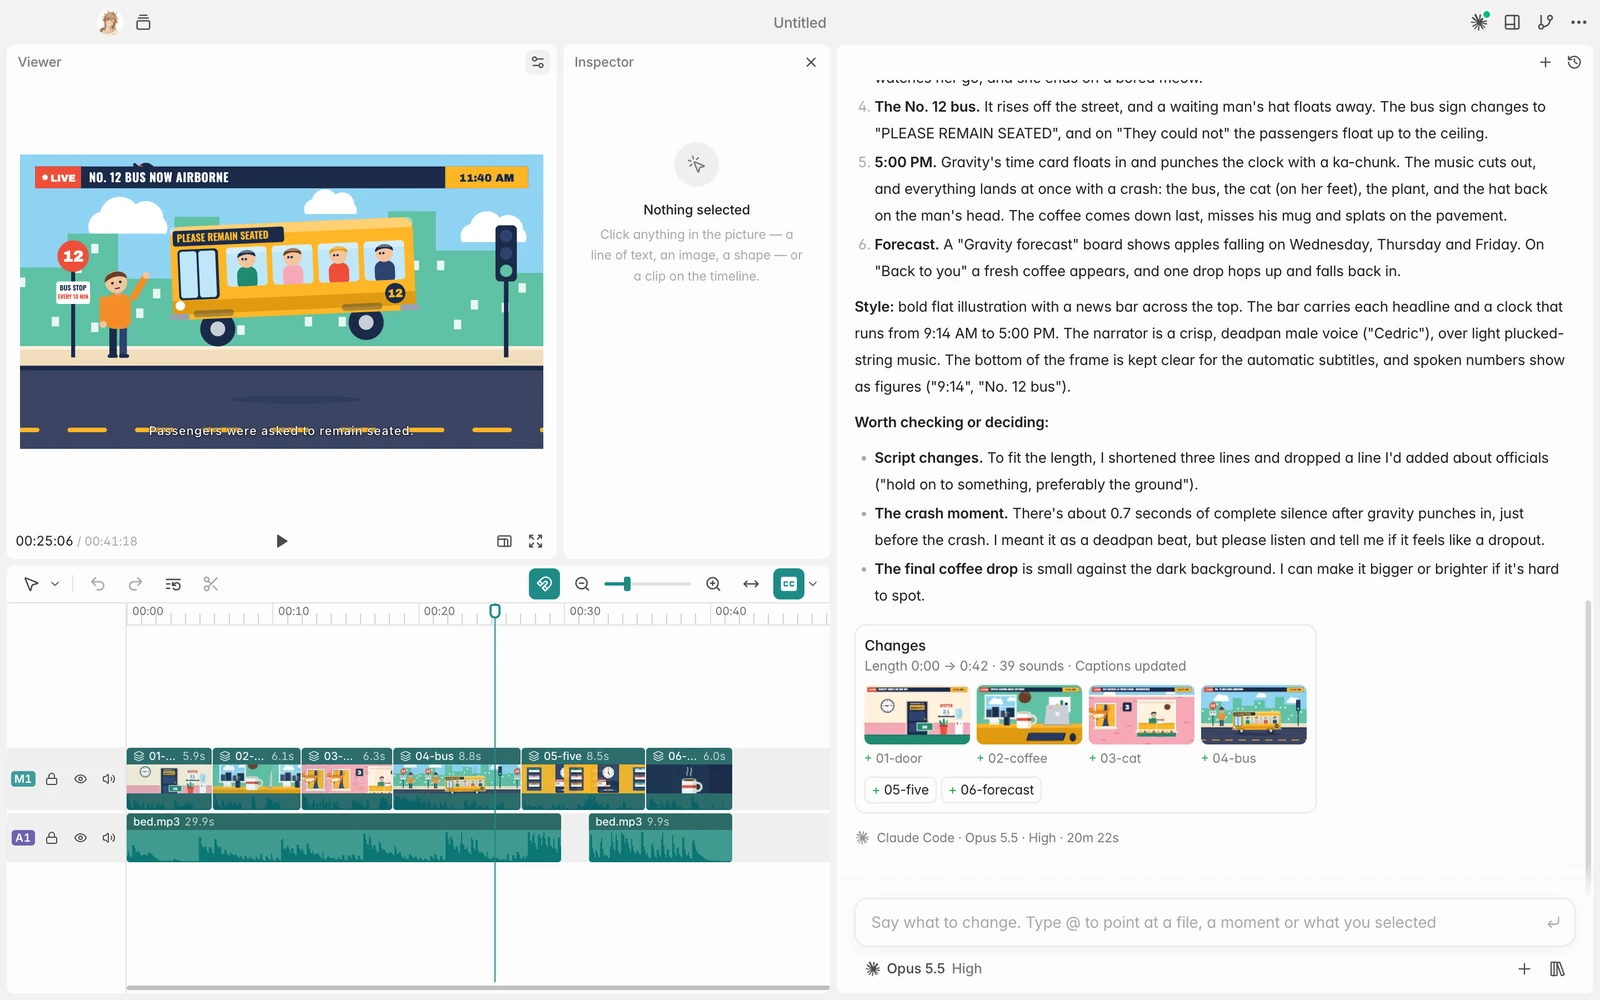
The four parts
| Part | Where | What it's for |
|---|---|---|
| Viewer | Top left | Plays the film. Click anything in the picture to select it, double-click text to retype it. |
| Inspector | Beside the viewer | Exact values for what you selected: position, size, text, font, colour, timing, volume. Closed until you need it. |
| Timeline | Along the bottom | Every scene, clip, narration line, sound and music track, in time. Move, trim and split clips here. |
| Chat | On the right | Talk to the agent, see what it did, and follow each round of changes. |
The top bar
From left to right:
- Your avatar opens the main menu, including Notifications and Settings.
- Projects lists all your projects, with a dot when another one needs you or has finished. See Running several projects.
- Get the Mac app, in the browser only.
- The title, in the middle. Click it to rename the project.
- Third-party agents: connect coding agents (Mac app). See Drive AnimSpark from your coding agent.
- Layout: show or hide the chat, timeline and inspector.
- Version history: saved versions of the film. See Versions and history.
- More (…): Share, Export, and Publish to cloud for projects stored on your Mac.
Arranging the panels
Layout has three switches: Chat, Timeline and Inspector. The chat and timeline start open; the inspector starts closed and opens by itself when you click something in the picture or a clip on the timeline. The inspector also has a toggle (Show inspector) at the right of the Viewer panel's header, and it stays the way you last set it.
Drag the border between the viewer and the chat to give either one more room.
The viewer's bar
Under the picture:
- The timecode, the current time over the film's length.
- Play (Space).
- Delivery frame: preview the film in another shape (16:9, 9:16, 1:1, 4:5, 4:3, 21:9) with bars, without changing it. When you pick one, Re-lay it out for … writes a request in the composer to rebuild the layout for that shape; send it if you want it. Export starts from the frame you picked.
- Full screen. In full screen, click the picture to play or pause.
In a new, empty project this button is Aspect ratio instead, and it sets the film's actual canvas before anything is made.
The chat
The chat keeps the whole conversation with the agent, one round after another: your message, the work folded into one line, the agent's answer, and a Changes card. See What the agent does.
The header shows the session's name once it has one; click it to rename. + starts a New session (a fresh conversation about the same film) and Session history finds older ones. Both are greyed out while a turn is running: a project runs one chat at a time.
The composer at the bottom is where you ask for changes. The chip under it picks the model and effort or, in the Mac app, another agent.
Keyboard shortcuts
Shortcuts don't fire while you're typing in a text field, except Esc, which stops a run. Settings → Keyboard shortcuts lists the main ones.
| Keys | Action |
|---|---|
| Space | Play / pause |
| ← → | Step one frame (Shift for one second) |
| Home End | Jump to start / end |
| ⌘Z / ⌘ShiftZ | Undo / redo your edits |
| ⌘B | Split the selected clip at the playhead |
| ⌘C / ⌘V | Copy clips / paste at the playhead |
| Delete | Delete selected clips |
| ShiftDelete | Ripple delete |
| A / B | Select tool / Split tool |
| Alt | Hold while dragging to skip snapping |
| Enter / ShiftEnter | Send / new line |
| Esc | Stop the run, close a dialog, clear the selection |
On Windows and Linux, use Ctrl where you see ⌘.