
Edit
The timeline
Every scene, clip, narration line, sound and music track, laid out in time. Select, move, trim, split, copy and delete clips, with snapping.
The timeline runs along the bottom of the editor. Each track has a badge on the left, and each clip shows its name and length.
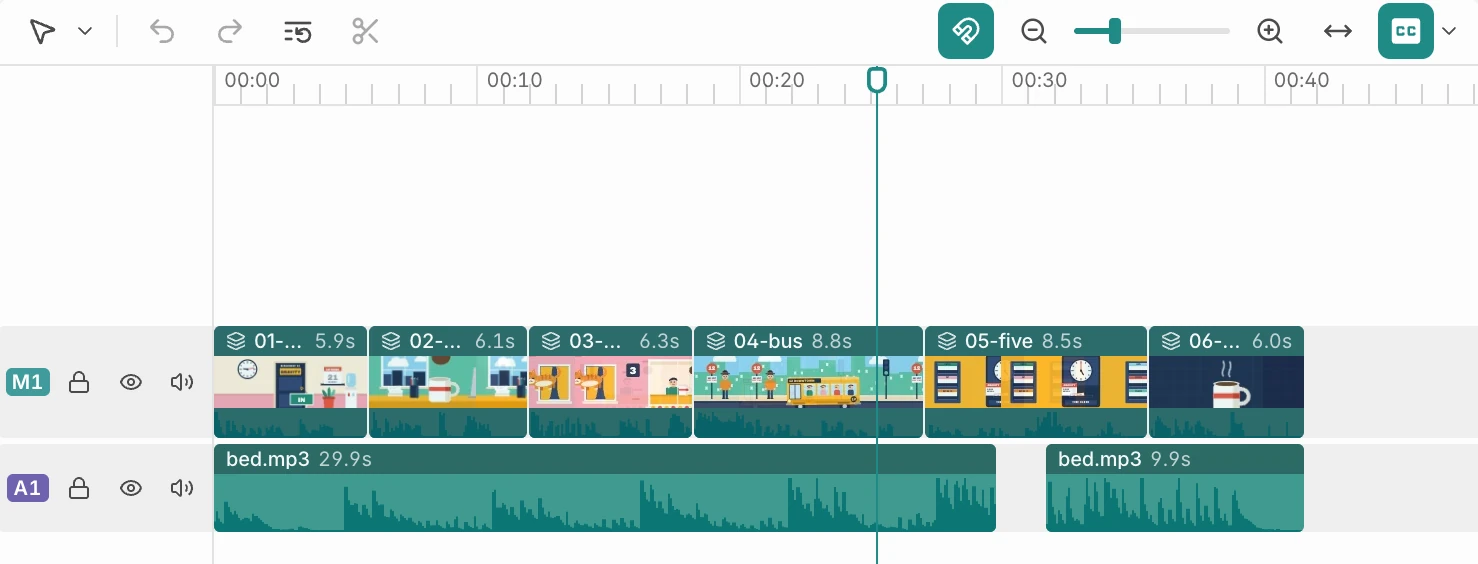
Tracks
Tracks hold one kind of clip each: motion graphics (the scenes), footage, narration, sound effects and music. The buttons on each track's header:
- Lock track: clips on a locked track can still be selected, but not moved, trimmed, split, deleted or pasted onto.
- Hide track: turns the track off.
- Turn off original sound: silences the track.
Select clips
- Click a clip to select it. The playhead stays where it is.
- ⌘-click to add or remove a clip; Shift-click to add one.
- Drag across empty space to draw a selection box (hold Shift or ⌘ to add to what's selected).
- ⌘A selects every clip on unlocked tracks.
- Click empty space to clear the selection and move the playhead there. Esc clears it too.
A selected clip also gets handles in the picture and shows its timing, transform and volume in the inspector.
Move, trim and split
| To | Do this |
|---|---|
| Move a clip | Drag it along the track |
| Move it to another track | Drag it up or down, or onto a new track |
| Trim | Drag either edge. Dragging the left edge also moves where the clip starts playing from |
| Split at the playhead | ⌘B, the Split button, or right-click → Split at playhead |
| Split where you click | Switch to the Split tool (B) and click the clip; A goes back to Select |
| Copy and paste | ⌘C, then ⌘V pastes at the playhead |
| Delete | Delete |
| Ripple delete | ShiftDelete removes the clip and closes the gap |
Locked tracks are skipped by all of these.
Snapping
The magnet button turns snapping on and off. When it's on, clips snap to other clips' edges, to the playhead and to the start of the film. Hold Alt during a drag to place a clip exactly where you let go.
Zoom and scroll
- Zoom out and Zoom in buttons and the slider, or ⌘- and ⌘=. ⌘0 goes back to the default zoom (so does Fit to width).
- ⌘ + scroll zooms around the pointer. Shift + scroll moves sideways.
- Click or drag along the ruler, or drag the playhead, to scrub.
Right-click a clip
- Open composition: for a scene built from smaller clips (also a double-click). A breadcrumb shows where you are; the inside is view-only.
- Point at this clip in the chat: puts a reference to the clip in the composer.
- Split at playhead, Copy, Paste.
- Export this clip: for motion-graphic clips, exports that clip on its own, with a transparent background. See Export.
- Delete, Ripple delete.
Right-click empty space on a track for Paste and Point at this clip in the chat, which points at that moment.
Hold Shift and click or drag along the ruler to point at a moment or a stretch of time in the chat.
Add your own clips
Drag files from the Assets panel onto the timeline. A preview shows where the clip will land, and it snaps like any other clip. See Adding your material.
Subtitles
The Subtitles button (CC) at the right of the toolbar turns subtitles on and off in the picture. Its arrow opens Subtitle style:
- Preset: Outlined (default), Bar behind, Bold, heavy outline, Yellow, No outline.
- Effects: Word highlight, as a highlight box, colour or pop, with a highlight colour.
- Type, Colour and Layout: typeface, size, weight, tracking, leading, italic, uppercase; fill, stroke, shadow, box and opacity; alignment and maximum width.
Drag the subtitles in the picture to move them. The style travels with the project, so exports and shared films use it. If the film has no subtitles yet, ask the agent to add them.
Undo and edit history
⌘Z and ⌘ShiftZ undo and redo your timeline edits. The Edit history button lists this session's edits, yours and the agent's passes. See Versions and history.